Be red carpet ready with these ponytail essentials
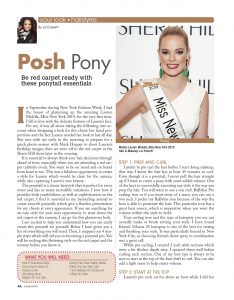
In September during New York Fashion Week, I had the honor of glamming up the amazing Lauren Molella, Miss New York 2019, for the very first time. I fell in love with the delicate features of Lauren’s face. For me, it was all about taking the following into account when designing a look for this client: her facial proportions and the fact Lauren needed her look to last all day. She met with me early in the morning to prepare for a quick photo session with Mack Hopper to shoot Lauren’s birthday images, then we were off to the red carpet at the Sherri Hill show later in the evening.
It is essential to always think your hair decisions through ahead of time, especially when you are attending a red carpet celebrity event. You want to be on trend and on brand from head to toe. This was a fabulous opportunity to create a style for Lauren which would be clean for the camera, while also capturing Lauren’s true beauty.
The ponytail is a classic hairstyle that is perfect for every event and has so many incredible variations. I love how it provides both youthfulness, as well as sophistication on the red carpet. I find it essential in my hairstyling arsenal to create smooth ponytails which give a flawless presentation for my clients at every appearance. If you are searching for an easy style for your next opportunity to strut down the red carpet or the runway, I say go for this glamorous look.
I am excited to help you understand how you can easily create this ponytail for yourself. Below I have given you a list of everything you will need. Then, I mapped out 4 simple steps which will aid you in becoming a ponytail pro. You will be rocking this flattering style on the red carpet and the runway before you know it.
Step 1: Prep and Curl
I prefer to pin curl the hair before I start doing makeup, that way I know the hair has at least 45 minutes to cool. Even though it is a ponytail, I never pull the hair straight up if I want to create a pony with some added volume. One of the keys to successfully executing any style is the way you prep the hair. You will want to use a one inch BaByliss Pro curling iron or if you want more of a wave, you can use a two inch. I prefer my BaByliss iron because of the way the heat is able to penetrate the hair. This particular iron has a great heat source, which is imperative when you want the volume within this style to hold.
Your curling iron and the type of hairspray you use can actually make or break setting your style. I have found Kenra’s Volume 25 hairspray is one of the best for setting and finishing your style. It was particularly humid in New York City, so choosing Kenra’s shine spray in combination was a great call.
While pin curling, I created 2 inch wide sections which were a bit thicker depth wise. I sprayed them well before curling each section. One of my best tips is always to be sure to start at the top of the hair shaft to curl. You can also add a light tease to help create volume.
Step 2: Start at the Top
Lauren’s pin curls sat for about an hour while I did her makeup. I started at the top letting her pin curls down and then brushed them out with a smoothing brush. If you have coarse hair, you may prefer a boar’s hair brush. Be patient with each section as you pull the pins out. Be sure to reinforce the teasing as you go down as well, making sure you are setting the base for a great style which will last. If you want to soften the curls even more, comb through gently with a wide tooth comb a couple of times.
While this step may seem incredibly simple, it is the key to making sure there is the least amount of static possible. Once you have all of the hair down, put a light coat of the shine spray on your hand and trace the outer edges of the hairline. This will ensure you have a well-groomed base for the style.
To read the rest of the Hairstyles feature… Click Here
To subscribe to Pageantry magazine… Click Here
To follow Pageantry magazine on Instagram… Click Here
To follow Pageantry magazine on FaceBook… Click Here


